Wednesday, August 19, 2015

DIY Homemade Natural Hair Gel


My mum has been complaining about me losing too much hair. She said if I don't take care of my hair now, I will be bald when I am her age. I frantically look for hair growth tips and I read some articles that said aloe vera and lavender oil are good for promoting hair growth. Then I thought why not make a hair gel with these two ingredients. I can 'kill two birds with one stone' - I can style and nourished it at the same time. Also, unlike commercial hair gel that contains a lot of weird ingredients, this recipe only calls for 4 and they are all natural.

Ingredients
¼ teaspoon unflavoured gelatine

½ cup hot distilled or filtered water (I used tap water)
1 tablespoon aloe vera gel

4-6 drops essential oils 


Directions:
Heat the water and mix in the gelatine in a small saucepan. Stir well to combine.
Once the liquid is cool and before it is set, add in the essential oils and aloe vera gel.
Stir the mixture and pour the mixture into a glass jar.  
Store the container in the refrigerator for at least 3 hours or until the gelatine set.
Keep styling gel refrigerated between uses.
Gel will keep for about 2 weeks in the refrigerator.


(Some gelatine is made from animal parts. Therefore, I have a recipe especially for Vegan) 
Ingredients:
1/2 teaspoon agar-agar flakes
1/2 cup hot water
1 tablespoon aloe vera gel
 4-6 drops essential oils 


Directions:
Heat the water and mix in the agar-agar flakes in a small saucepan. Stir well to combine.
Once the liquid is cool and before it is set, add in the essential oils and aloe vera gel.
Stir the mixture and pour the mixture into a glass jar.  
Store the container in the refrigerator for at least 3 hours or until the gelatine set.
Keep styling gel refrigerated between uses.
Gel will keep for about 2 weeks in the refrigerator.

Essential oils for hair care
Lime essential oil smells amazing, and is helpful for balancing oily hair. In a more concentrated form it may also lighten hair.

Peppermint and rosemary essential oils stimulate hair growth and add shine. Great for normal hair.

Basil, thyme, patchouli, tea tree and lemongrass have astringent properties which are beneficial for oily hair
Chamomile, lavender, sandalwood and rosemary are helpful for dry hair.

Clary sage, tea tree, eucalyptus, and patchouli are helpful for dandruff

Monday, August 17, 2015

Sensory play activity with dry pasta - Hide and Seek with animals

He loves playing with the dry pasta. Maybe it is because he is only allowed to play with it when I am around. Small things like pasta can be a chocking hazard so I prefer to supervise him while he is playing with it. 


For this activity, I hid the plastic animals in the pasta and I asked him to find the animal. I will name the animal and make the animal's sound. When he found it, he will repeat the animal's name and sound. I am a believer in praise, encouragement and rewards for kids. I always praise him when he do well.  I always felt a little encouragements wont hurt.
 

Sunday, August 16, 2015

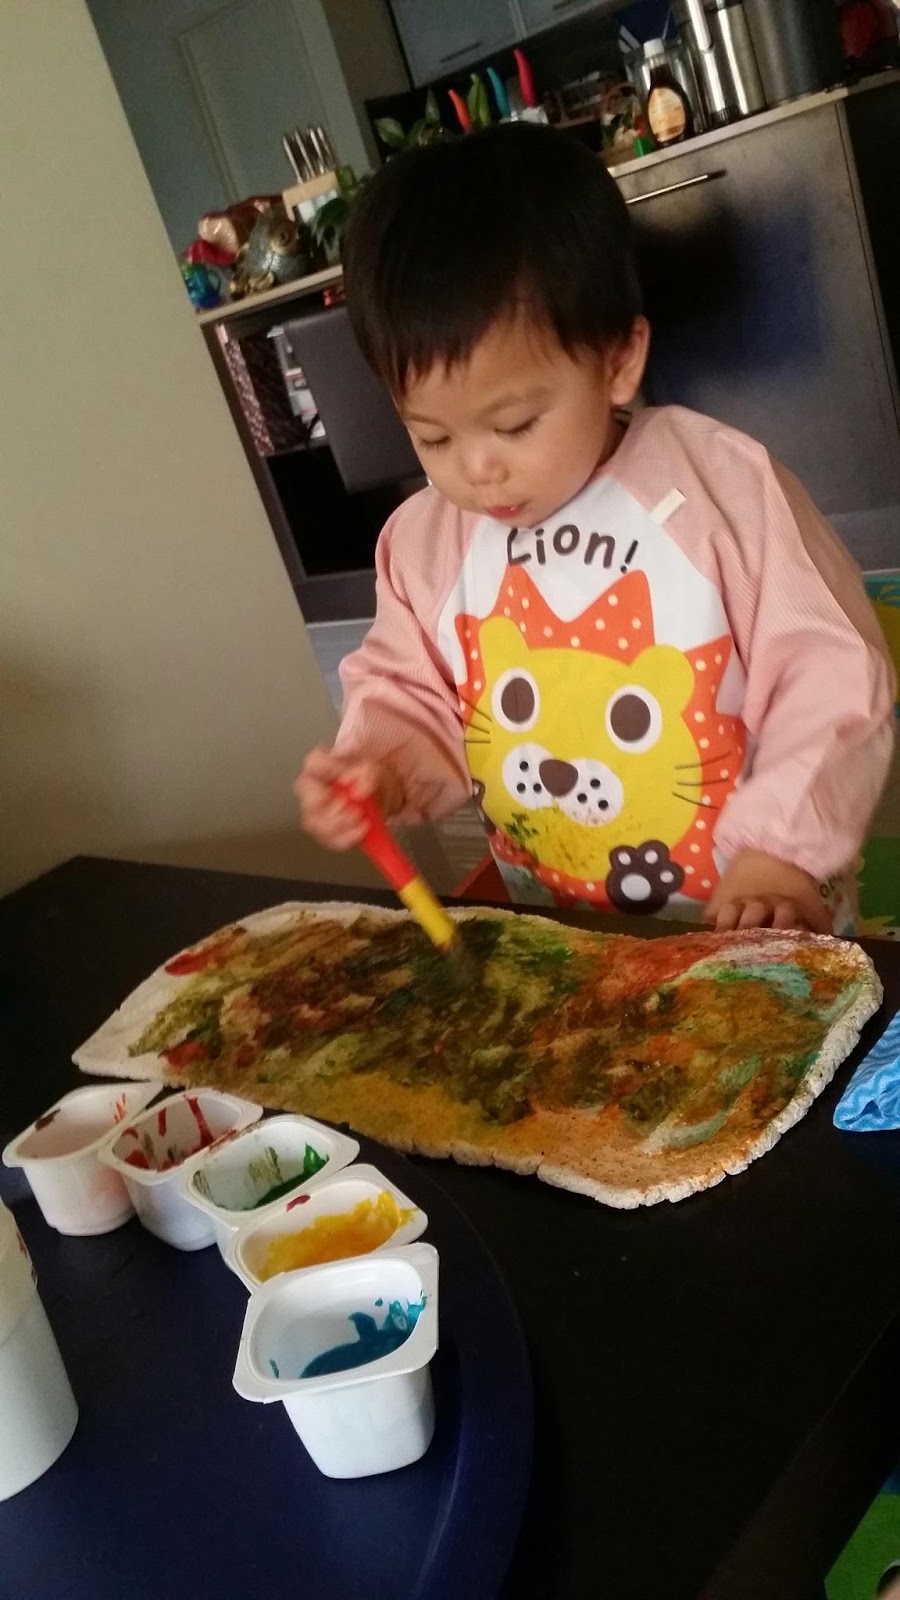
Homemade edible Finger paint

I made some salt dough alphabets and handprints plaque last week and was so excited to make the paint so that I can paint it with my little Sebastian. This is my first time making edible paint and it turns out not too bad. Just a little bit lumpy. I should have used my food processor to mix all the ingredients before cooking it on the stove. But overall, it is a pretty good experience and I will definitely make it again with my little Sebastian.

Ingredients:
1 cup of Flour
4 tablespoons of sugar
2 cups of cold water
Pinch of Salt
Food colouring


Instructions:
Mix all of the ingredients together in a food processor except the colouring. (Make sure the mixture is smooth and not lumpy) Then transfer the mixture to the stove and heat in on a medium low fire. Stir it constantly until the mixture thicken. Once it has thickened turn the burner off and let it cool. After cooling divide the finger paint into separate storage containers and add food coloring. Make sure the lids are on tight while storing so it doesn’t dry out.

Wednesday, August 12, 2015

Family Handprints with Saltdough


Family handprints - From far left is grandma, Sebastian, Daddy and Mummy
Last Tuesday night, I had this crazy idea to make a family handprint plaque from salt dough.  This is my second attempt in using salt dough (my previous project -alphabets with salt dough ), the recipe I used this time is slightly different from the previous one. The last recipe was using 1 cup of flour with 1 cup of salt and this recipe is using 2 cups of flour with 1 cup of salt .I try this recipe because I was hoping that the salt dough will look less grainy. The handprint plaque turns out less grainy but I think it still can be better.( I probably should have grind the salt to make it finer) But, I felt that this recipe takes longer to dry.

Ingredients:
1 cup salt
2 cups flour
1cup water


Instructions:
Mix all ingredients in a mixer until a smooth dough forms. Make holes in the plaque, or add hooks.(depending on your preference) To dry the dough, bake in oven at 250F (approx. 120C)  for at least 3 hours. Then flip over and bake an additional 45-60 minutes, or until it is hard.


Can't wait to put some colours to it this weekend with Sebastian. We are going to have so much fun with the edible paints.
  

Sunday, August 9, 2015

Learning activities for toddlers - Learning alphabets with salt dough

Weekend is always a good time for me to work on my big projects that require a lot of my time. This week's project is making alphabets with salt dough. This project requires at least 2 to 3 hours of baking time. The process of making the initial is not long but the baking time takes forever. 


Sebastian (my little handsome 28 months old baby ) and I had a lot of fun making the alphabets. The only difference is that he was using his play dough while I used the salt dough =P.


 Let's start baking!


 Ingredients:
1 cup salt
1 cup plain flour (all purpose)
Up to half a cup of water (add bit by bit until the right consistency) 


Instructions:
Mix together until smooth. Knead into a stretchy dough. If it is too sticky then add more flour.

 
When the models are finished, lay them on some baking parchment (greaseproof paper) and cook on a very low heat for about 2 - 3 hours. About 100 degrees C (210 F) is enough. If the models are thick then they will need to be turned half way through and may need an extra hour.  


The alphabets turns out pretty good and can't wait for next weekend when we can put some colours the alphabets. I am planning to make some edible paint for him. Stay tune for my next post on edible paint.
ACTIVITIES
  1. I printed out the alphabets in an A4 paper and asked him to match it.
  2. I mixed all the alphabets in a container and get him to find the alphabets. 
  3. Next weekend activity -  Colouring the alphabets  


Thursday, August 6, 2015

Learning Activities for Toddlers - Jell-O play dough

My little Sebastian (28 months now) loves play dough. We made some last month and we spend hours playing with it. I bought him some plastic cookie cutters to cut the play dough into shapes. Sometimes, he will ask me to make animals with the play dough too. It is really good for him as I can see his hands and fingers are becoming stronger and more agile.
 
Then I thought it will be a good idea to make some Jell-O play dough where he can learn about colours and smells.  It is so easy to make and I took less than 30 minutes to make 3 colours; Blue heaven, Strawberry and Lime. They smell so good.

Ingredients:


Instructions:
Mix all the ingredients listed on the 'Ingredients' to a mixing bowl.  


Mixed all the ingredients and pour the mixture into a saucepan. Cook the mixture on medium heat and stir it constantly. 


The mixture will gradually turn into a dough. When it is ready, it will look like the last picture shown in the following diagram.


Let it cool down in the saucepan for a while and start to work on the second batch (If you are making more than one colour) When the dough is cool, transfer it to a floured surface and knead it until the dough is not sticky. Add more flour as needed.  (You can add extra food colouring or even glitters to make it more interesting). Then pack it into a container. 

Sebastian was trying to match the Aeroplane Jelly box with the correct container. He was saying "Green-Same", "Red-Same" and "Blue-Same". It was so cute! Then I opened the container to let him smell the aromas. He loved it!


The Jell-O play dough is so much fun, I even made this into a small present for my friend's baby boy birthday. I hope he will love the play dough  as much as Sebastian loves his. 


Wednesday, August 5, 2015

Sensory activity with dry pasta


I love spending time with my little munchkin but as a working mum, I don't have enough time with him. I reached home from work at around 6pm and he sleeps at 8pm. Therefore, the 2 hours we have is very precious to me.  When he was younger, we spent the time cuddling each other and reading books. But now he is older, I think I should introduce some learning activity to our 2 hours quality time.  I want him to feel that mum is not just for comfort but mum can be a friend too.

 
I started to look for some activity online that is easy to setup and is great fun for my little boy who is now 28 months. I found this sensory activity using dry pasta and this activity helps the little ones to explore their sense of touch and sound.
 
What you need for this activity

  • A big container to store the pasta
  • 2 bags of Coles small pasta shells (500g per bag)
  • Recycled yogurt cups, measuring spoons and some recycled plastic containers


I set it up on his play table with the lid still closed on the container. He was so excited and he kept on drumming the lid on the container like the drum rolling and waiting for me to reveal the mystery behind the lid. Once I lifted the lid he immediately dipped his hand into the container to feel the pasta. His face was filled with excitement and he kept on laughing and smiling.  It is priceless to see such happiness on his face.

Such a simple activity for us as an adult but it is quite challenging for the little ones. He was very engaged with the activity and I thought to myself that this is a very good activity for him to learn to scoop the pasta and to fill up the containers without spilling on the table. When the shell pasta drop on the floor, he will say “Opps! Pasta drop.” Then, he will pick it up and put it back on this spoon. It is so cute to see him so serious.  He loves to shake the little containers when the lids are closed because it reminds him of the sound made by the maracas.  (He has a set of percussion instruments)
This activity turns out not just a sensory activity but he learned so much more than that. I am so happy seeing him having fun while learning. I will definitely try to find more of these activities to play with him. 

NOTE: Pasta can be a real choking hazard so please be careful. I stayed by his side the whole time while he was playing with it.